
Melbourne’s Leading Concrete Pouring Specialists
Oops! Something went wrong while submitting the form.
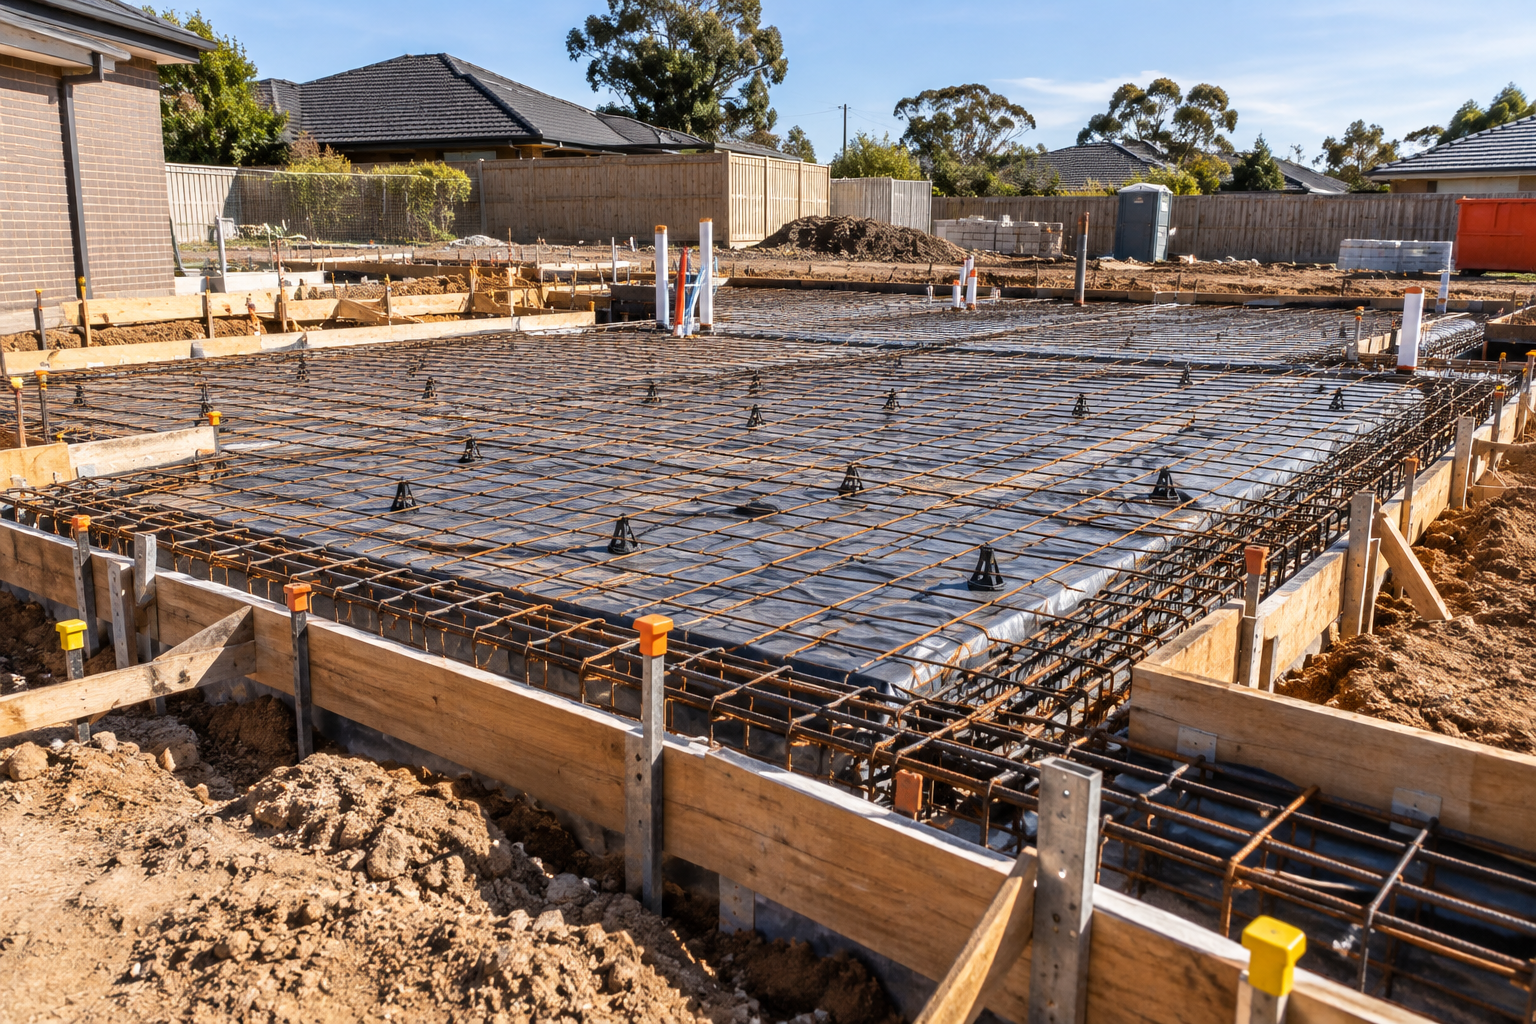
Concrete slab construction covers the design, preparation, forming, reinforcing, pouring and curing of a structural concrete floor or platform. Six slab systems are in common use in Australia, and three documents govern nearly all of it: AS 2870 for residential work, AS 3600 for concrete structures, and the National Construction Code.
What follows is the sequence as it actually runs on site, and which standard sits behind each stage.
Three documents do most of the work, and knowing which one applies stops a lot of argument on site.
AS 2870 covers residential slab and footing design, including the method for classifying a site. The Housing Industry Association describes its scope as covering the classification of a site and the design requirements that follow from it for ground and waffle slabs, stiffened rafts, strip, pad and piled footings.
If the project is a house, a townhouse or a small residential development, AS 2870 is the starting point.
AS 3600 governs the design and construction of concrete structures generally, including suspended slabs, post-tensioned slabs and any element outside AS 2870's residential scope. Multi-level work, podiums and commercial floors sit here.
The NCC housing provisions set the deemed-to-satisfy requirements for footings and slabs, and they reference AS 2870 for the design method. Where a design departs from the deemed-to-satisfy pathway, it becomes a performance solution requiring engineering justification.
Victorian work has a fourth document that matters after the pour rather than before it. The Building and Plumbing Commission's Guide to Standards and Tolerances 2026, which applies from 1 August 2026, sets the benchmarks a finished slab is judged against in a dispute.
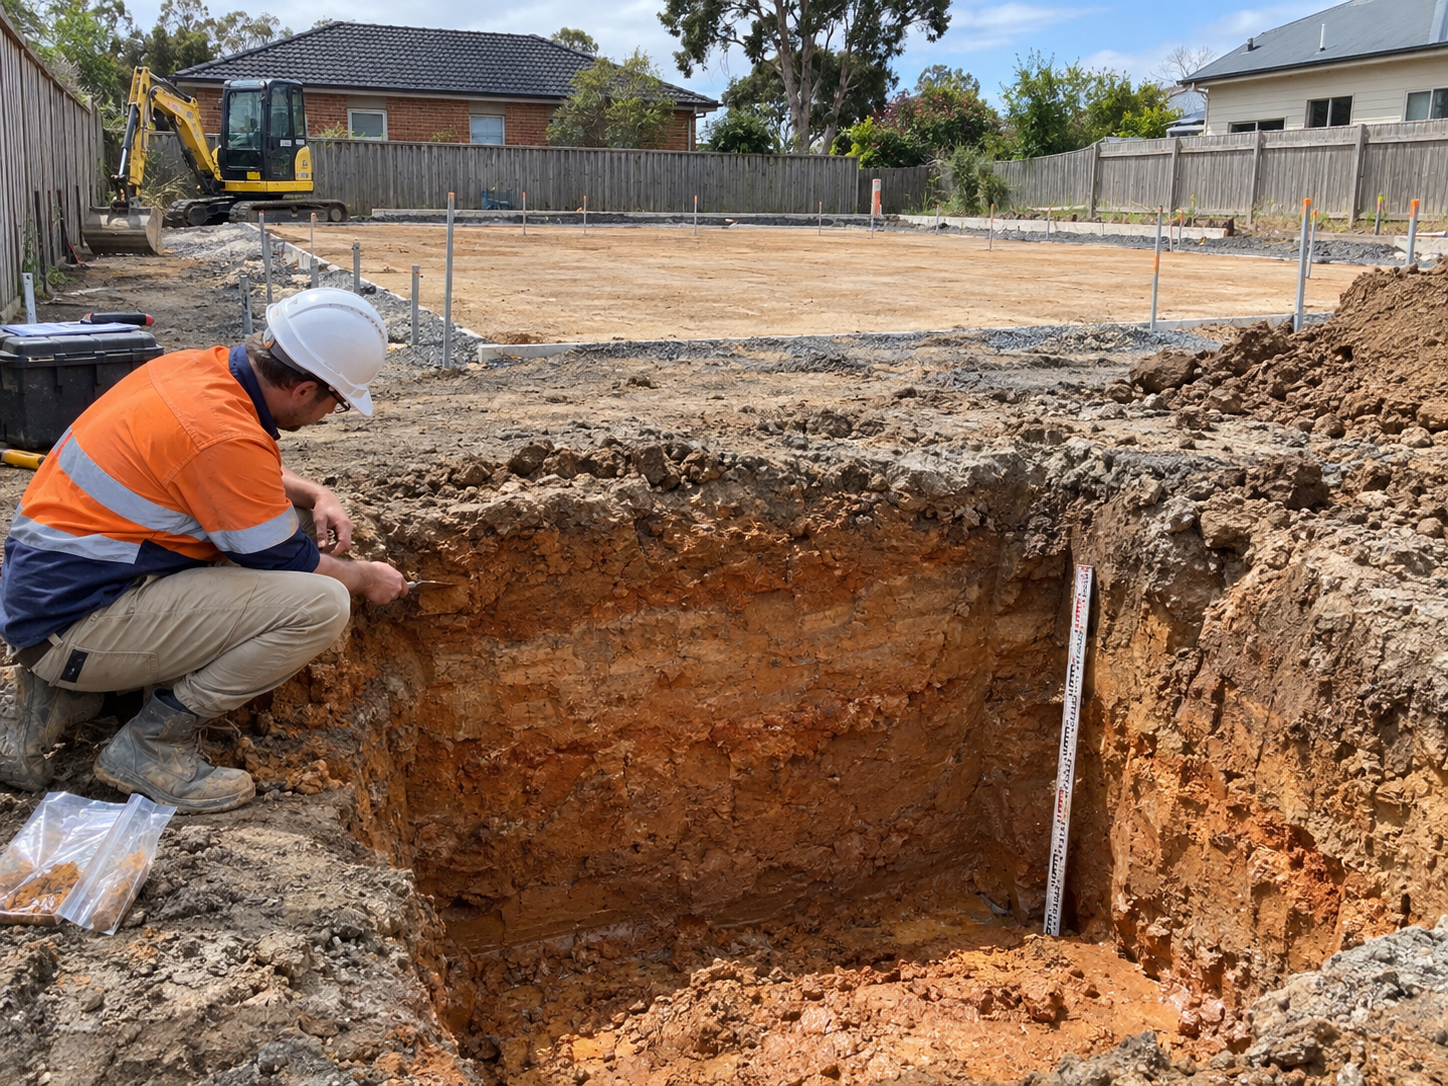
Nothing about the slab is chosen until the ground is classified. A geotechnical investigation establishes the soil profile, the reactivity of the material, the depth to competent strata and the groundwater condition.
The classification that comes out of it determines how much movement the slab has to tolerate. The AS 2870 classes run from A on stable sand and rock, through S for slightly reactive, M for moderately reactive, H1 and H2 for highly and very highly reactive clay, E for extremely reactive ground, and P where the site has a problem that puts it outside the normal classes, such as uncontrolled fill, soft soil, mine subsidence or a landslip risk.
The practical consequence is that the same slab drawing is correct on one block and inadequate on the block next door. A stiffened raft designed for Class M does not have the beam depth to bridge the movement a Class H2 site produces.
In Melbourne this is the single most consequential step, because reactive clay is widespread and it moves seasonally with soil moisture.
The ground swells in wet months and shrinks as it dries, and the slab has to accommodate that cycle for the life of the building rather than resist it.
Two things follow that builders regularly get caught by. A classification is site specific, so it cannot be carried across from a neighbouring lot or an earlier stage of the same subdivision. And a site that was classified before earthworks may need reclassifying afterwards, because cutting and filling changes the profile the classification was based on.
Six systems cover almost all Australian work. The engineer selects from them against the classification, the loads and the site constraints. This is not a builder preference and it is not a cost decision made at quoting stage.
A slab cast directly on a prepared subgrade, with the ground carrying the load. Simple, common and suited to stable sites with modest loads.
A slab on ground with integral stiffening beams around the perimeter and under internal load-bearing walls. The beams give the slab the stiffness to bridge across ground that moves, which is why it is the default on reactive clay.
A raft cast above ground level over a grid of polystyrene pods, forming a ribbed underside. The pods displace concrete and the ribs provide the stiffness, which changes both the excavation and the concrete volume.
A slab spanning between supports rather than bearing on ground, used for upper floors, podiums and structures over basements. Suspended concrete decks carry their loads in bending, so the reinforcement design is fundamentally different.
A slab with steel tendons stressed after the concrete gains strength, putting the section into compression. Thinner slabs over longer spans, at the cost of a design and stressing programme. The differences between post-tensioned and conventional slabs run through cost, program and crack control.
Factory-cast units craned into position, with the pour reduced to a structural topping and the joints. Fast on site, but it requires crane access and delivery sequencing that many residential sites cannot accommodate.
The subgrade is prepared to level and compacted to the specified density. Fill is placed and compacted in layers rather than in one lift, tested where the specification requires it, and the finished surface is trimmed to the underside of the slab.
Uncontrolled fill is the recurring problem here. Material tipped and levelled without compaction testing will settle under the slab, and a slab designed to span ground movement is not designed to span a void. Where fill depth is significant, the engineer may require the slab to be founded through it rather than on it.
Vapour barriers and termite protection go down at this stage, along with any under-slab services. Anything missed here gets cut out of the slab later, which is the most expensive way to install a pipe.
Where the platform has to be cut into a slope, the earthworks come first and they change the slab set-out. A site cut or benched platform alters levels, spoil volume and often the classification, so the slab design should follow the earthworks rather than precede them.
Formwork holds the slab edge, the set-downs and the beam profiles until the concrete can hold itself. It has to be stable under the weight of wet concrete and the loads placed on it during the pour. The set-out is transferred from the drawings to the site at this point, and an error here is built into everything above it.
Formwork geometry and support are what determine whether the finished slab matches the plan. Level tolerance is checked before the pour, not after. Once concrete is in, a slab that is out of level is a grinding job or a topping job.
Reinforcement is supplied, cut, bent and fixed to the engineer's schedule. Bar size, spacing, lapping and cover are all specified, and none of them are approximations.
Cover is the one most often compromised. Insufficient cover exposes the steel to moisture and is a durability failure that shows up years later as spalling.
Bar chairs and spacers hold the steel at the specified position during the pour, and they need to survive people walking on them.
Mesh, trench mesh and beam cages each have their own requirements, and the inspection before the pour exists specifically to confirm all of it.
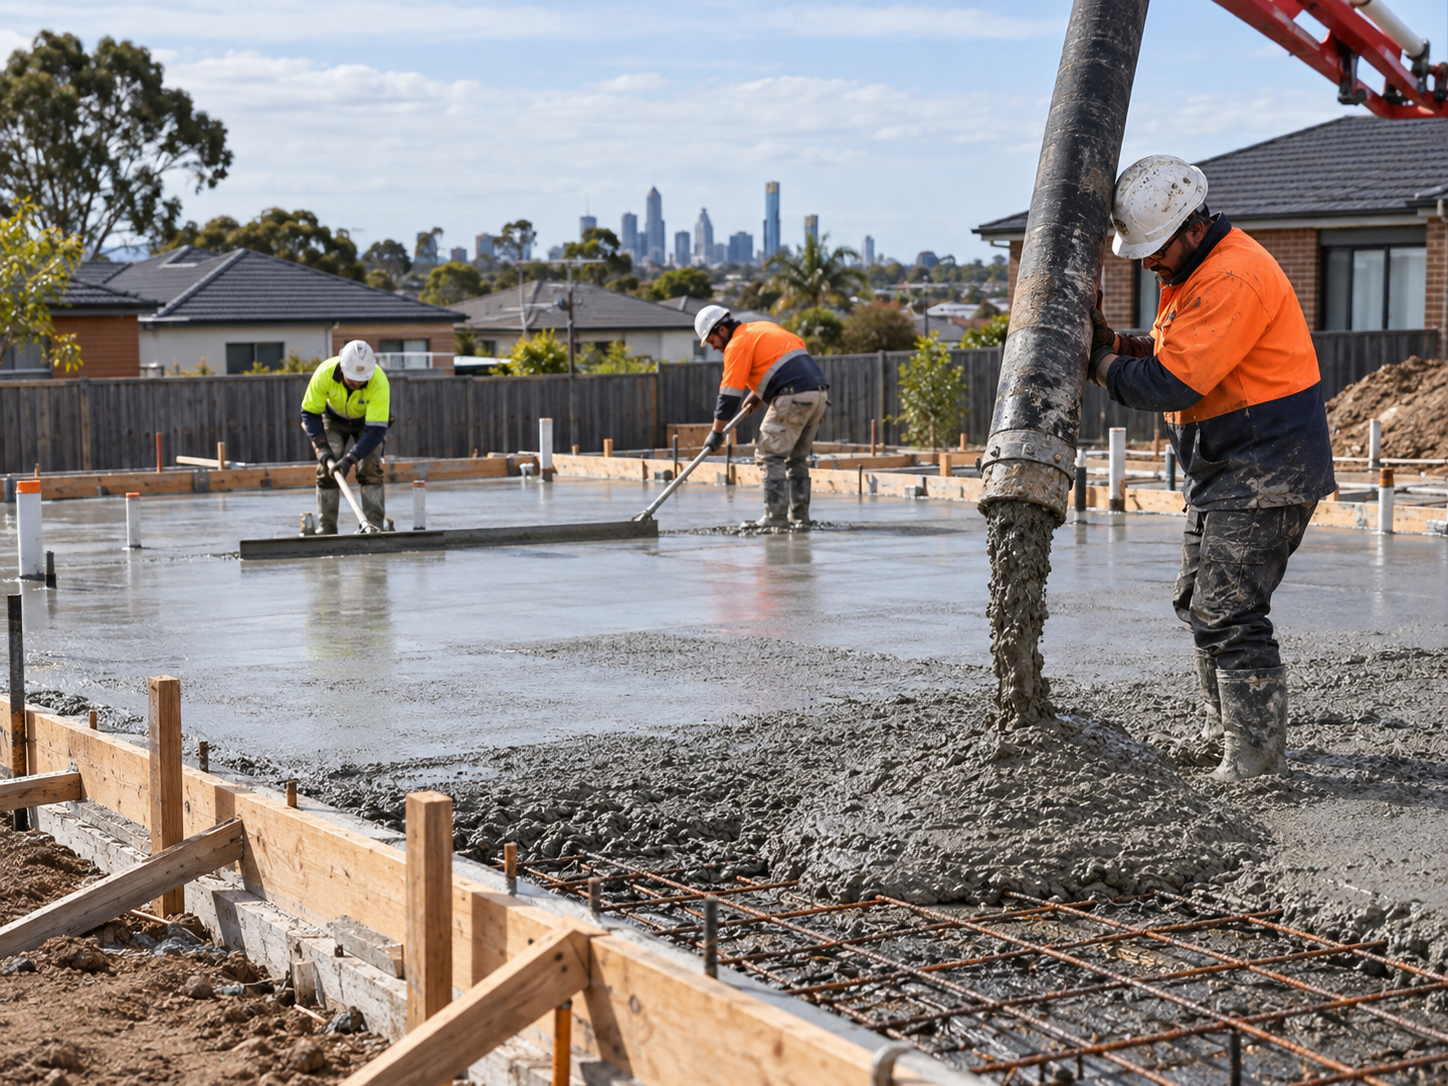
Concrete is placed, compacted and screeded to level in a continuous operation. The pour is planned as a sequence, because a slab that has to stop and restart in an unplanned place creates a cold joint where the design did not allow for one.
Placement method follows access. Direct chute where trucks can reach the slab edge, a boom pump where they cannot, and the choice affects both the sequence and the crew size.
Compaction removes entrapped air. Under-compacted concrete has voids that reduce strength and durability, and no amount of surface finishing corrects it.
The surface finish is specified, not chosen on the day. A slab that will receive tiles has different requirements to one that will be polished or left exposed.
Timing matters more than technique. Finishing too early works water into the surface and weakens it. Finishing too late means the concrete has gone off and the finish cannot be achieved.
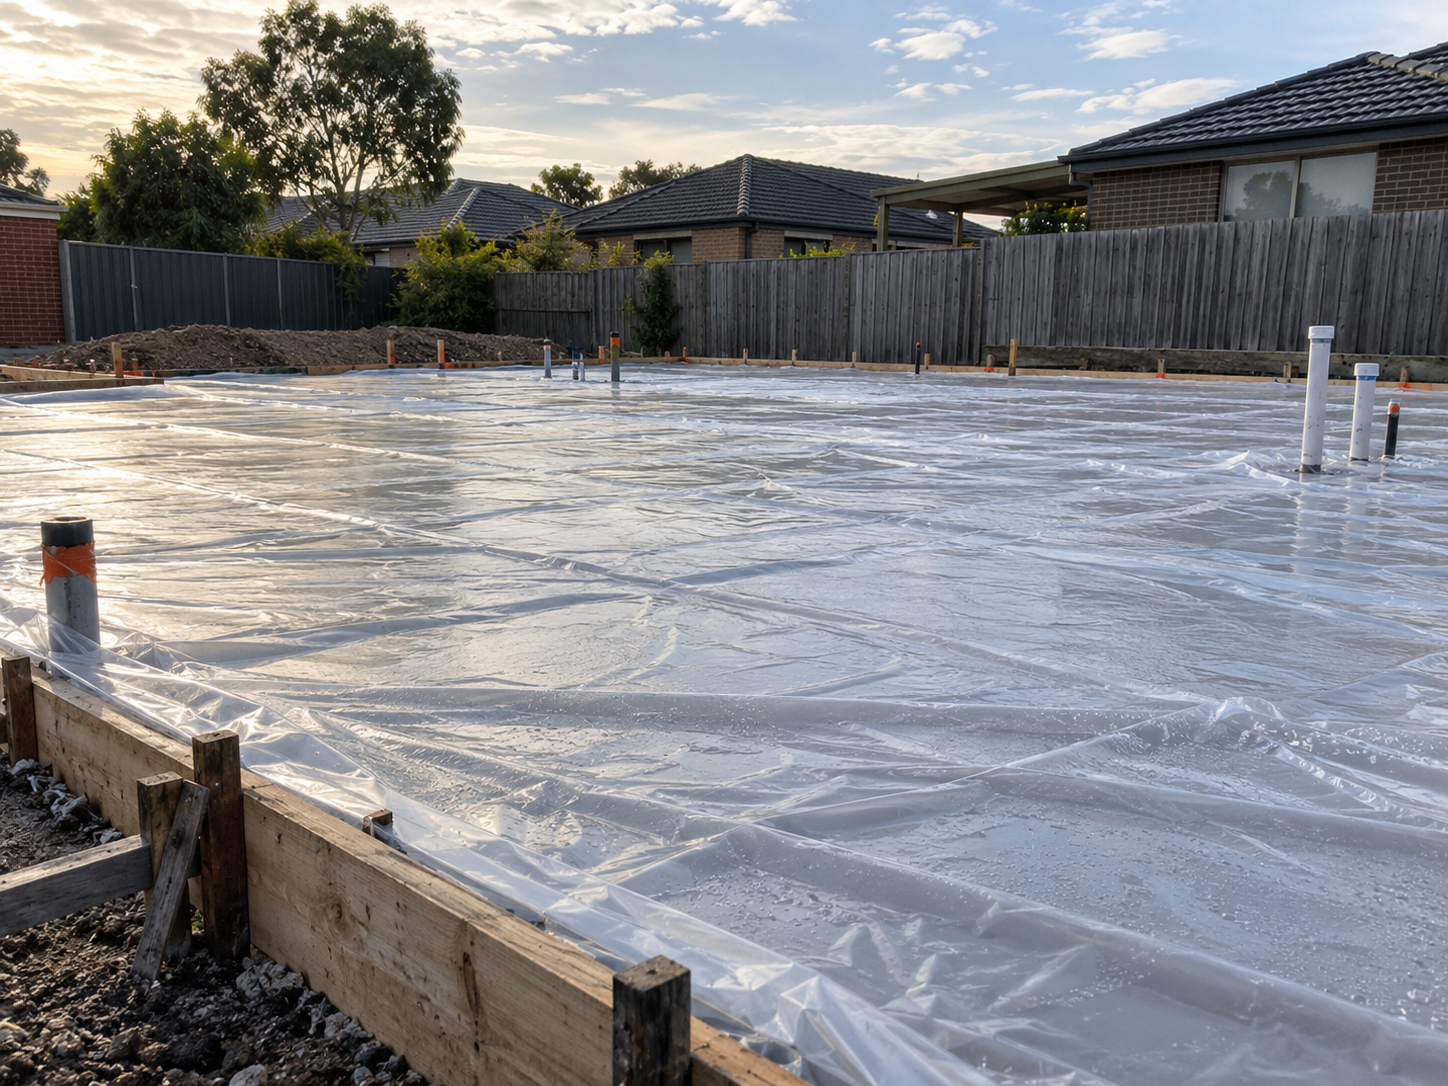
Curing keeps moisture in the concrete while it gains strength. Concrete does not dry out to harden, it hydrates, and hydration stops when the water leaves.
A slab that is not cured properly loses surface strength, cracks more, and is less durable. It is also the cheapest stage to do correctly and the one most often cut short because the next trade is waiting.
Curing method and duration should be in the specification. If they are not, ask before the pour rather than after it.
The pre-pour inspection is the one that cannot be recovered. Everything it covers is buried within the hour.
The pattern underneath all six is the same. The method was correct and the execution departed from the drawings.
Classify the site, have the engineer design the slab, prepare and compact the subgrade to level, install the vapour barrier, termite protection and under-slab services, erect the formwork and set out, fix the reinforcement to the schedule, obtain the pre-pour inspection, place and compact the concrete, finish to the specified finish, then cure it. The order does not change and none of the stages are optional.
Thickness is set by the engineer against the site classification, the imposed loads and the slab system, so there is no single figure that applies. Residential slab thickness is designed under AS 2870, and what actually determines slab thickness is the interaction of ground movement and load rather than a rule of thumb.
AS 2870 covers residential slabs and footings, including site classification and design. AS 3600 covers concrete structures generally, which is where suspended, post-tensioned and commercial slabs sit. The National Construction Code sets the deemed-to-satisfy requirements and references AS 2870 for the residential design method.
It refers to a hand-mixing proportion of four parts aggregate, two parts sand and one part cement. It is a small-batch ratio for minor works, not a structural specification. A structural slab uses a specified strength grade supplied from a batching plant, because strength has to be verifiable rather than assumed.
The structural engineer, working from the geotechnical report. The site classification and the imposed loads narrow the options, and access and program decide between what remains. A builder can raise constructability concerns, but the selection is not a preference.
Curing duration should be stated in the specification, and the concrete continues gaining strength well past the point it can carry construction traffic. The question to ask is not how long to wait but what strength the following trade requires, because that is what the engineer can answer.
An informal term for a low cement content mix or a soil and cement blend used for paths, bedding and non-structural fill. It has no place in a slab that carries load, because the strength is neither specified nor tested.
Every failure in this article traces back to one of two things: the wrong method for the classification, or the right method executed away from the drawings. Both are avoidable before anyone orders concrete.
Urban Pour builds reinforced concrete slabs and structural foundations across Melbourne, from slab on ground through to suspended and post-tensioned work. Send through the footing and slab plan and we will tell you what the scope actually involves.
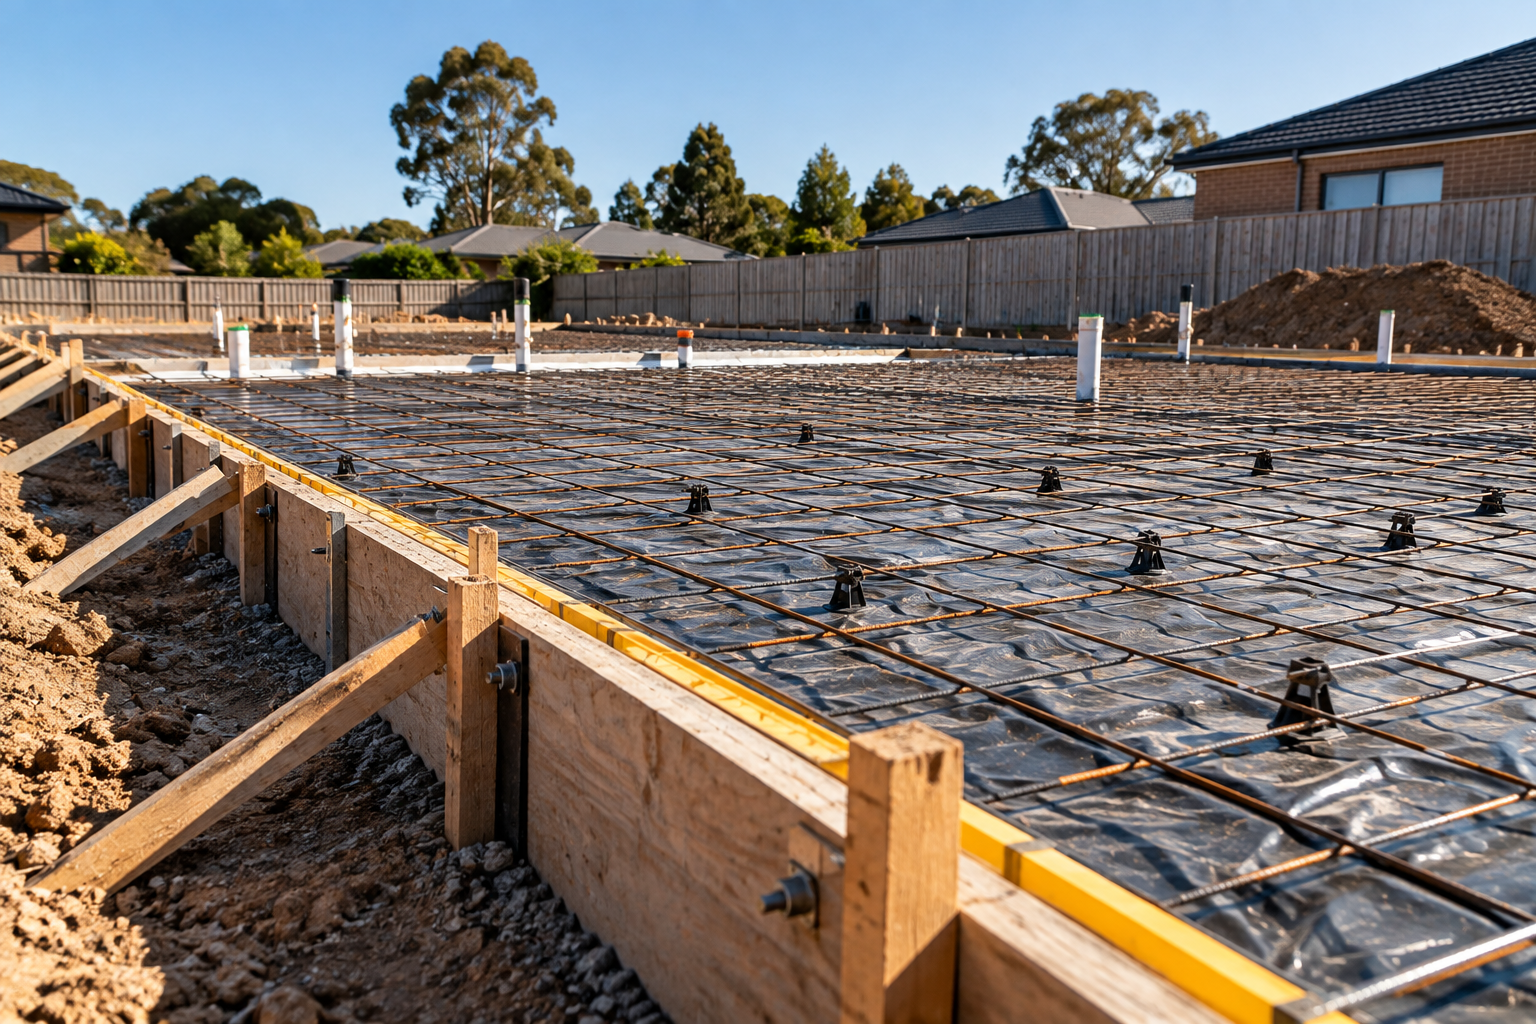
Calculate concrete slab volume in cubic metres, then account for beams, thickenings, waffle pods, subgrade tolerance and pump losses before ordering.
See more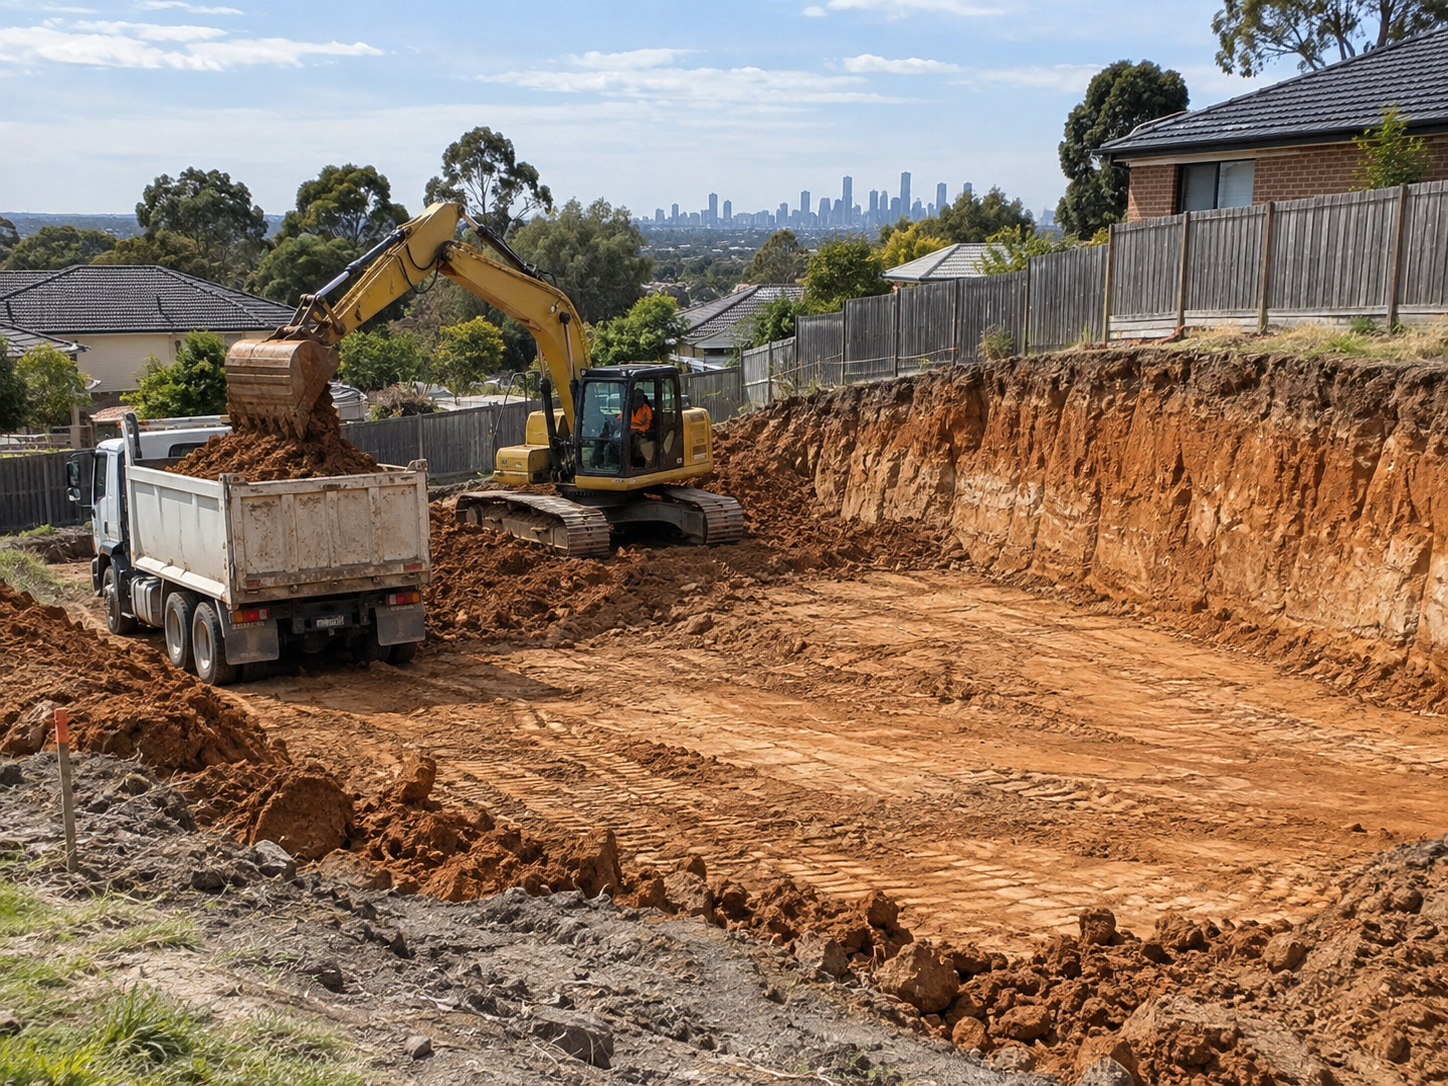
Site cut vs site benching explained for Melbourne builders, including excavation methods, safety requirements, ground conditions and what to check before earthworks begin.
See more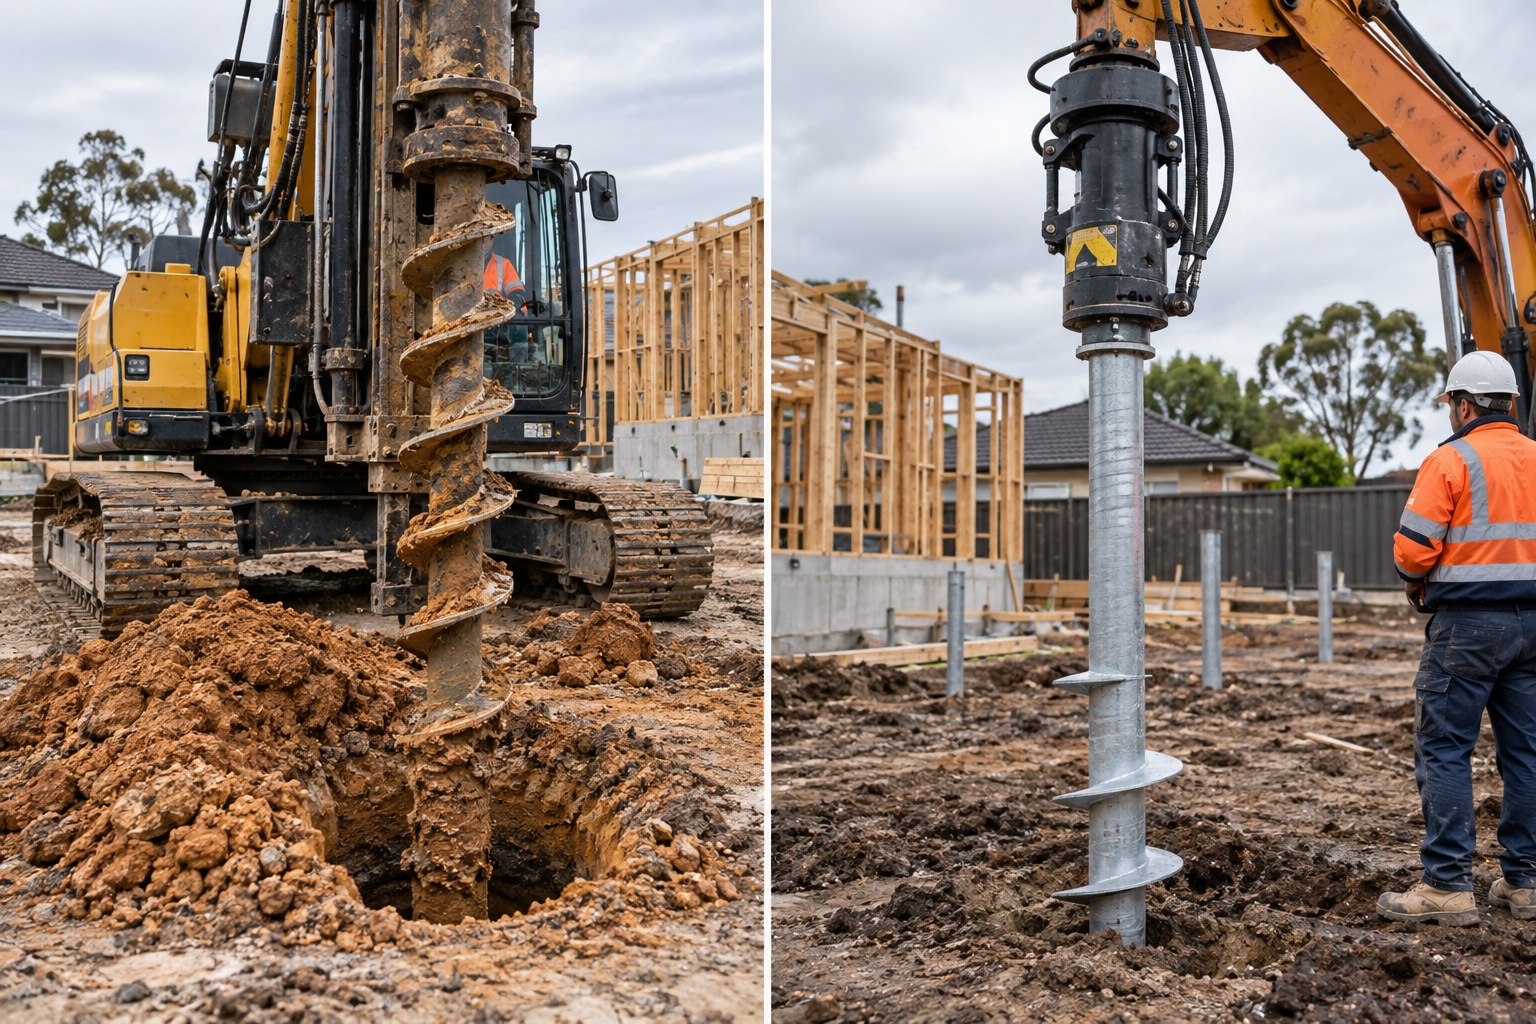
Compare bored piers and screw piles for Melbourne sites, including load, soil, access, spoil, cost drivers and programme.
See more